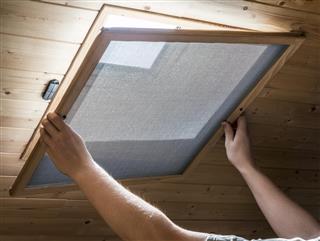
If you are looking for guidelines on replacing window screens, this article is just what you are looking for. Read to get a basic overview of it.
With the summer round the corner, you can expect our age-old friends, the mosquitoes, to make an entry. If you have gaping holes in the window screen fabric, welcoming them, it’s time to go for a replacement. Also known as insect or bug screens, they are our primary defense mechanism against the blood thirsty arthropods. If you want peaceful sleep in summer, then a replacement is absolutely necessary.
Replacement Technique
A window screen is usually made up of a synthetic fiber mesh, metal wire, or fiber glass, that is fitted in a metal or wooden frame. The main advantage of having such a screen is that it allows fresh air flow, while filtering the bugs out. They are common fixtures in homes across United States, Australia, and even Canada. Replacement is a simple and straightforward job, which you can easily do on your own, with the requisite tools at hand. Here are the things you will need to get the job done:
- New Screen Roll
- Measuring Tape
- Sharp Knife or Cutter
- New Rubber Edging
- Screen Roller Tool
All these materials and tools will be easily available at your neighborhood hardware store. Buy the new rolls, according to how many you plan to replace at a time.
Once you are ready with all the necessary tools and materials, you can begin the replacement. First thing to do is remove the old screen, from its frame. Then place it on an expansive and flat hard surface, which can accommodate the entire unit.
Next part is to remove the rubber edging, that is the connection of the screen with the frame. The rubber edging must be pulled out to remove the old screen. With rubber edging out of the way, you can easily remove the old window screening mesh, out of the frame.
It is absolutely necessary that the new screen has the same dimensions as the old one. So, after removing the old one, measure it and accordingly decide on the dimensions of the new screen. Let the dimensions be such that the length and breadth of the new one, are a little more than the frame dimensions. Unroll the new material and measure out the replacement screen. Cut out the new screening, using the sharp knife or the cutter.
Once the cutting is done, lay out the screen upon the frame. Then, get hold of the new rubber edging material and cut out enough so that it fits around the frame perfectly. Now comes the part where you must use the screen roller tool, to fit the rubber edging.
Using the rolling tool, carefully push the rubber edging around, into the frame groove, that will sandwich the screening in between. Go slow and do not press the rolling tool too deep, as it may damage the new screening. As you go around rolling in the rubber edging around the frame, the screening will be attached to it. Once all the rubber edging is in, you can cut out any excess screening left around the frame, using the knife. With that done, your job is essentially over. Now, all you have to do is put the screen back into the window frame and you are done. If the holes in the screen are small, then you can go for repair, which will cost lesser.
Doing this job on your own, will save a lot on the cost. It is an important home improvement job before the onset of summer. That way, you will be prepared for the attack of the blood sucking, flying arthropods.


