Slate tile flooring has gained a lot of popularity, mainly because it is an environment friendly material, and at the same time, has an amazing visual appeal. In this article, we have highlighted some of its most important aspects.
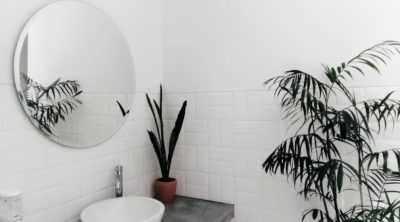
Most homeowners consider slate tile flooring as a great choice for indoor areas like the kitchen, bathroom, basement, as well as for the outdoors like porches. It has an inherent fine-grained texture, as it is made of various naturally occurring rock stones like quartz, mica, calcite, and so on. These tiles are found in a wide range of colors, shapes, and patterns that are really pleasing to the eye. Thus, they can be used to improve the overall look of any part of the house.
Pros and Cons
Slate tiles are well-known for several advantages associated with them. The stone material is very tough which make the flooring long-lasting. The surface is non-porous and it does not absorb moisture on any other liquid that spills on the floor. For this reason, it can be used in areas of high moisture, like the bathroom, kitchen, or basement. It does not require much care and maintenance, as stains and marks are not easily noticeable due to its dark color.
The main reason why some people avoid this type of flooring is that it is not a good sound absorbent. Another problem is that its grout often get stained very easily, and thus, the entire flooring looks dirty. If you have small children in your house, then this may not be the right option for you, as the highly polished surface of these tiles tend to be slippery. Moreover, it gives a very hard and cold feel under the feet.
Installation
Whether you are installing the slate tiles on an outdoor or indoor surface, just make sure that the base of the flooring is strong enough to hold the heavy tiles. The main steps of installation are:
Step#1: The floor where the tiles are to be installed should be thoroughly cleaned to get rid of all kinds of dirt and grime from it. Check out the floor if there are any cracks, holes or any other damages on it. Repair all of them by filling up the gaps with the help of a leveling compound. Thus, you can get a leveled surface where you can lay the tiles.
Step#2: In order to provide a strong and even base to the slate flooring tiles, underlayment pads are installed on the floor. Basically, they are made of cement and are quite stiff in nature. Before, you install them, read the instructions provided by the manufacturer carefully. Now, install the underlayment on the concrete floor according to that. If the surface of the floor is more or less uniform, you can avoid installation of any subfloor. This is also not required for an outdoor flooring.
Step#3: Create a layout pattern with the slate tiles in advance and arrange the tiles accordingly on the prepared subfloor. Start laying the tiles from the center of the floor and move towards the walls on either sides. Use half inch tiles spacers in between the tiles. Finally, when you reach the wall area, you will find gaps where one whole tile cannot be fitted in. Measure that gap area and cut the tiles as per that using a wet saw and place them into it.
Step#4: Prepare the thinset mixture after reading the directions given on its label. Then start the process of application of mortar from one corner of the room. Take some mortar on a trowel and spread it over the concrete or subfloor after lifting a tile and put the tile back on its place and press it lightly. Tap it with a rubber mallet to keep the level of the tile uniform. If any excess of mortar is pressed out, then wipe off with a damp cloth or sponge.
Step#5: Let the applied thinset get cured thoroughly which usually takes around 24 hours or so and then start applying grout to the slate tile joints. Once you have grouted all the tiles of the room, wait for 24 hours so that the grout can dry up completely. After that if you find any dents on the newly applied grout surface then apply grout on all those spots one more time. For the next couple weeks, keep the work area untouched and let the grout cure properly. Finally, apply a coat of good quality tile sealant on the tiles to prevent any stains on the flooring.
This type of flooring has a relatively high cost. Depending on the size, finish, and thickness of the tiles, the cost may vary from $3 and $9 per square foot. If you hire professionals for the installation, then the cost will be much higher. In fact, the cost of installation will be more than the cost of the materials that are used. Roughly, professionals charge around $5 – 10 per square foot for installation. Therefore, if the base of the floor is in good condition, you should lay the tiles on your own.