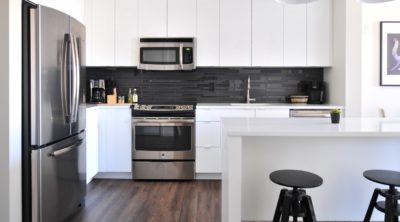
Formica countertops are quite popular in homes all over the world, and are widely appreciated. Read on to know how to install them.
It is understandable that you might get confused when it comes to the kitchen and bathroom décor, especially the flooring and tile options. I mean, there are so many of them that choosing the best one is really a huge task! Countertops are popular and have been used for a long time now. Installing them is not tough these days, with many advanced materials and easy techniques available. If you are wondering about which type would fit into your house the best, you need to know a bit more about all the options. Formica is one of the best options you have in such a situation. They are really easy to install at home, durable, long-lasting, and available in many colors.
Tips and Instruction
This will be one of the easiest DIY projects you undertake, if you know some pretty basic stuff about construction. Just make sure you have everything you may need close by; you don’t want to go back and forth to your storage room while you are in the middle of the project.
# Step 1: The first step requires you to gather all the tools and other material, which includes sandpaper, scribe tool, epoxy glue or thinset cement, rubber mallet or laminate roller, measuring tape, table saw, double-sided adhesive tapes. Needless to say, this is, obviously, in addition to the actual countertop that you would be installing!
# Step 2: When you are done with purchasing all the tools, you can start off with the installation. Here, if you already have an old countertop, then you need to remove it. This can be done by loosening the glue and taking it off with the help of a scribe tool. Also, you would need to detach the sink temporarily for the new one to fit.
# Step 3: This step is the most vital of all. Here, you need to measure the countertop and cut it accordingly with the help of a table saw. If your desired shape is not rectangular, you will have to cut it accordingly; for instance, you will have to separately cut the arms for an ‘L’ shape. In my opinion, it’s better to just get the cutting and shaping done before you actually buy it. The dealer, who would be much more experienced in these matters than you, may be able to help you out with some tips as well.
# Step 4: While starting the installation, firstly rub the surface with sandpaper, then apply epoxy glue or cement to the cabinet or sub surface, followed by application at the back of the Formica sheet. Lay the sheet on the cabinet and press it hard. You can use a rubber mallet or a laminate roller to ensure that the installation is perfect and there aren’t any air bubbles left. Let it dry out for a few hours at a stretch.
Nonetheless, if you aren’t confident about this DIY project, then you could get a professional to do it for you. The average cost for this procedure comes up to 7-25 USD per square foot, which is pretty affordable for most. I hope this content solves all your doubts. Keep the cost in mind, and stay safe during all the cutting. Good luck!


